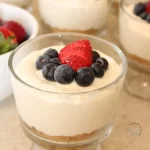
No-Bake Cheesecake Cups: A Deliciously Simple Dessert
Hey there, fellow food lovers! Today, we’re diving into the world of creamy, dreamy desserts with a twist: Individual No-Bake Cheesecake Cups! If you’re like me, you adore the rich flavors of cheesecake but sometimes feel a bit daunted by the baking process. Well, guess what? No baking is required for this delightful treat! Instead, we’re blending, layering, and chilling our way to sweet success.
These adorable cheesecake cups are perfect for every occasion, from festive gatherings to cozy weeknight dinners. Imagine creamy, luscious cheesecake nestled in a buttery graham cracker crust, layered with fresh berries, and served in cute little cups. Whether you pop them in the fridge for a rainy day or whip them up for guests, they’re sure to impress.
What I love most about this recipe is its flexibility. You can dive into your pantry and customize these little treats in a myriad of ways, making them as unique as you are. Plus, they come together quickly, so you can spend less time in the kitchen and more time enjoying the company of friends and family.
Ready to get started? Grab your apron and let’s create something wonderful together!
Personal Story
One of my fondest childhood memories involves my grandmother’s famous cheesecake. As a kid, I would stand on a stool beside her, eagerly watching her whip together what felt like magic in our cozy kitchen. The way she carefully blended the cream cheese and sugar, the sweet aroma of vanilla wafting through the air—it was like she had a secret recipe for happiness.
But let’s be honest, I was mostly there for the beaters! After she mixed everything together, she’d always let me lick the beaters clean—a treat I still savor to this day. It’s that same comforting nostalgia that inspired me to create these No-Bake Cheesecake Cups. They remind me of those fun times spent with Grandma, but thanks to their easy preparation, they’re a breeze to whip up even on the busiest of days.
Ingredients
Before we roll up our sleeves and get mixing, let’s gather our ingredients. Here’s what you’ll need for these scrumptious individual no-bake cheesecake cups:
-
1 Sleeve Graham Crackers
These are the base for your crust! Use store-bought or make your own. If you’re feeling adventurous, try using chocolate graham crackers for a twist. -
1/4 Cup Sugar
A little sweetness for our crust. You can substitute with coconut sugar or a sugar alternative if you’re watching your intake. -
5 Tablespoons Butter, Melted
This binds everything together to create a buttery graham cracker crust. If you prefer a dairy-free option, coconut oil works beautifully too! -
2 Packages (8 oz) Cream Cheese, Softened
This is the star of our cheesecake filling! If you want a lighter option, you could swap one package out for Greek yogurt—just keep in mind it’ll alter the flavor slightly. -
2 Cups Powdered Sugar
Adds sweetness and creaminess to the cheesecake. Substitute with erythritol if you’re looking for a low-sugar alternative. -
2 Cups Heavy Whipping Cream
Whipped to fluffy perfection, this gives the cheesecake its light, airy texture. For a non-dairy version, try a coconut or almond-based whipped cream substitute. -
2 Teaspoons Vanilla Extract
For that classic cheesecake flavor! Ensure you’re using pure vanilla extract for the best flavor; avoid imitation where possible. -
Fresh Berries of Your Choice
Berries add freshness and lovely color. Go with strawberries, blueberries, or raspberries—mix and match to your heart’s content!
Step-by-Step Instructions
Now it’s time to bring this dessert to life! Follow along carefully, and feel free to sprinkle in your special touch along the way.
-
Prepare Your Crust
Begin by crushing your graham crackers into fine crumbs. You can do this by placing the crackers in a zip-top bag and rolling over them with a rolling pin or pulsing them in a food processor. You want them finely crushed, almost like sand.Chef Tip: If you like a chunkier crust, leave some larger pieces!
-
Mix the Crust Ingredients
In a large mixing bowl, combine the crushed graham crackers with 1/4 cup of sugar and melted butter. Stir until all the crumbs are evenly coated and the mixture resembles wet sand.Chef Insight: The butter acts as a glue. Just the right amount will keep the crust together without being too greasy!
-
Form the Crust
Spoon the crumb mixture evenly into the bottom of individual cups or small mason jars. Press the crumbs firmly to create a solid base for your cheesecake.Chef Hack: Use the bottom of a measuring cup to pack it down nicely!
-
Prep the Cream Cheese Filling
In a separate bowl, beat your softened cream cheese until smooth and free of lumps. This is crucial to avoid a lumpy filling later. You can use a hand mixer or stand mixer for this.Chef Tip: If your cream cheese is a bit hard, microwave it for about ten seconds to soften it up.
-
Add Sugar and Vanilla
Gradually add in the powdered sugar, mixing well until combined. Pour in the vanilla extract and mix again until everything is smooth and creamy.Note: Taste your filling here! Adjust the sweetness if you prefer a sweeter cheesecake—or add more vanilla for that yummy flavor!
-
Whip the Heavy Cream
In a clean bowl, whip your heavy cream until soft peaks form. This may take a few minutes, so be patient! You want it fluffy but not over-whipped.Helpful Tip: For best results, chill your mixing bowl and beaters in the freezer for about 10 minutes before whipping the cream.
-
Fold Cream Into Cheese Mixture
Gently fold your whipped cream into the cream cheese mixture. Start by taking a small amount of whipped cream and mix it into the cream cheese to lighten it up. Then, carefully fold in the rest, trying not to deflate the whipped cream.Chef Hack: This light folding technique keeps your filling airy and irresistible!
-
Layer the Cheesecake Cups
Now for the fun part! Spoon your cheesecake filling over the crust in each cup, smoothing the top with a spatula or the back of a spoon.Pro Tip: You can alternate layers of filling and berries for added texture and flavor!
-
Chill:
Cover each cup with plastic wrap and refrigerate for at least 4 hours, or overnight if you can wait! This allows the flavors to meld together beautifully.Expert Tip: The longer it sits, the better it’ll taste!
-
Serve with Fresh Berries
When you’re ready to serve, top each cheesecake cup with fresh berries for a pop of color and flavor. You can also drizzle a bit of honey or chocolate sauce over the top to wow your guests!Final Touch: A sprig of mint can add a lovely touch and elevate your dessert!
Serving Suggestions
To serve, simply remove the plastic wrap from your cheesecake cups, and if you’re feeling fancy, add a dollop of whipped cream and a few extra berries on top for garnish. These are perfect for any gathering, from casual get-togethers to formal celebrations—everyone will love them! Plus, the individual portions make them super convenient to grab and go.
Recipe Variations
Feeling adventurous? Here are a few ways to mix it up with your individual no-bake cheesecake cups:
- Chocolate Cheesecake: Add melted chocolate to the cream cheese mixture for a rich, chocolaty version!
- Nut Butter Swirl: Stir in a few tablespoons of your favorite nut butter (like almond or peanut) for a nutty twist.
- Citrus Zest: Add lemon or lime zest for a refreshing flavor that cuts through the creaminess.
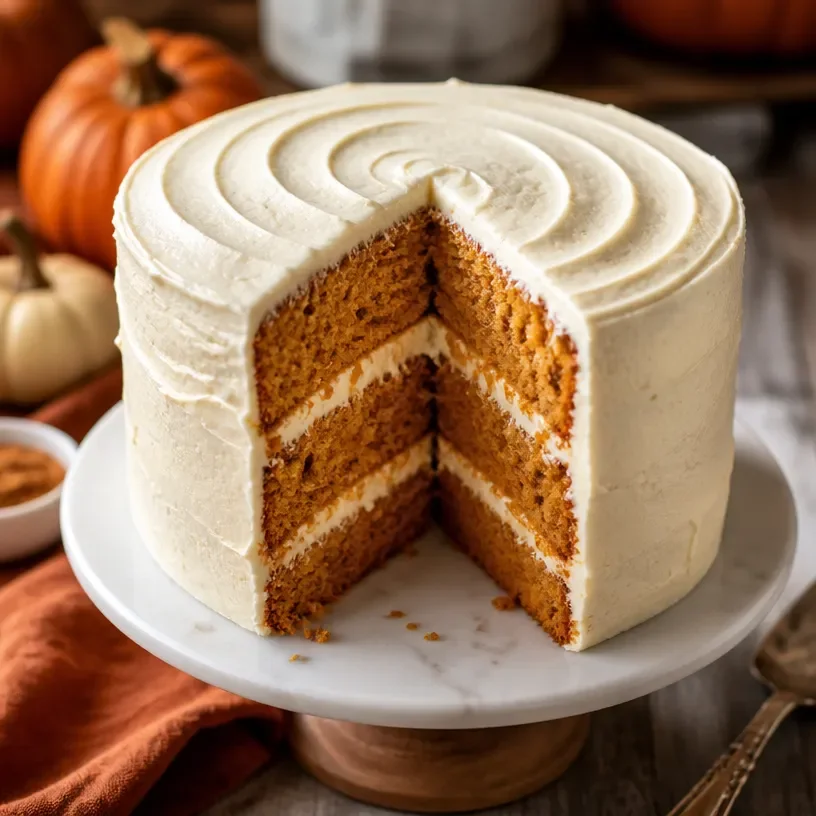
- Spiced Pumpkin: Mix pumpkin puree and cinnamon into the filling for a festive fall treat.
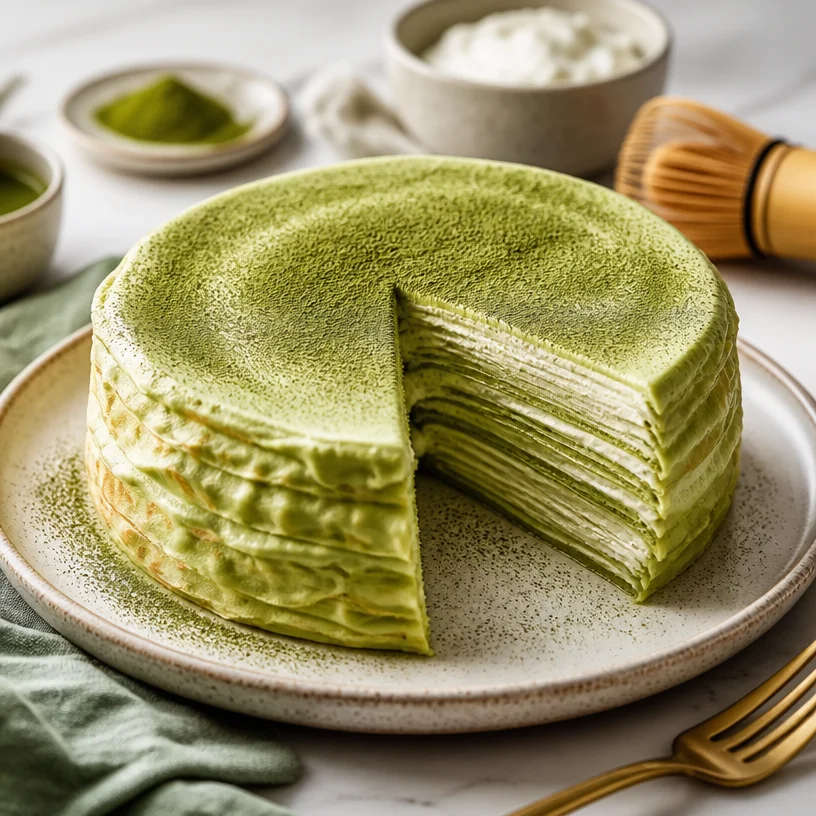
- Matcha Cheesecake: Incorporate matcha powder into the filling for a vibrant green tea flavor!
Chef’s Notes
I must admit, this no-bake cheesecake recipe has been through its own evolution over the years. What started as a trial to avoid turning on the oven during sweltering summer months turned into my go-to dessert for any occasion! I’ve played around with different types of cream cheese and fillings, even adding chocolate ganache on top… I think I might have a new obsession!
Oh, and when I was developing this recipe, I may have eaten a few too many spoonfuls of the filling before it even made it into the cups. Who can resist that creamy goodness?
FAQs and Troubleshooting
1. My cheesecake filling turned out lumpy. What went wrong?
It sounds like the cream cheese didn’t soften enough before mixing. Always ensure your cream cheese is at room temperature for a smooth filling!
2. How long do these last in the fridge?
They’re best enjoyed within 3-4 days, but they can typically last up to a week in the refrigerator if covered tightly.
3. Can I freeze these cheesecake cups?
Absolutely! They freeze well; just ensure they’re airtight. Let them thaw in the fridge before serving. The texture may change a bit, so keep that in mind.
4. What can I do if I don’t have powdered sugar?
You can make your own! Simply blend granulated sugar in a blender or food processor until it’s a fine powder.
Nutritional Info
While I aim for these desserts to be a comforting indulgence, if you’re looking for a rough estimate of the nutritional info, here’s a basic breakdown:
- Calories: ~300-350 per cup (depending on variations)
- Fat: ~22g
- Carbohydrates: ~30g
- Protein: ~6g
(Keep in mind, this is an approximation and can vary based on ingredients.)
And there you have it, my lovely friends! I hope you enjoy making these individual no-bake cheesecake cups as much as I do. They’re a wonderful way to bring sweetness to any gathering and share a bit of love from your kitchen to others. So go ahead, get creative, and most importantly—enjoy every bite! Happy cooking! 🍰❤️
PrintNo-Bake Cheesecake Cups
Individual no-bake cheesecake cups layered with a buttery graham cracker crust and topped with fresh berries. Perfect for any occasion!
- Prep Time: 15 minutes
- Cook Time: 0 minutes
- Total Time: 240 minutes
- Yield: 6 servings 1x
- Category: Dessert
- Method: No-Bake
- Cuisine: American
- Diet: Vegetarian
Ingredients
- 1 Sleeve Graham Crackers
- 1/4 Cup Sugar
- 5 Tablespoons Butter, Melted
- 2 Packages (8 oz) Cream Cheese, Softened
- 2 Cups Powdered Sugar
- 2 Cups Heavy Whipping Cream
- 2 Teaspoons Vanilla Extract
- Fresh Berries of Your Choice
Instructions
- Prepare your crust by crushing graham crackers into fine crumbs.
- Mix the crust ingredients in a mixing bowl until combined.
- Form the crust by spooning the mixture into cups and pressing down.
- Prep the cream cheese filling by beating the softened cream cheese until smooth.
- Add sugar and vanilla to the cream cheese and mix until creamy.
- Whip the heavy cream in a separate bowl until soft peaks form.
- Fold the whipped cream into the cream cheese mixture gently.
- Layer the cheesecake filling over the crust in each cup.
- Chill the cups in the refrigerator for at least 4 hours.
- Serve topped with fresh berries and optionally drizzle with honey or chocolate.
Notes
These cheesecake cups are highly customizable; try adding chocolate, nut butter, or citrus for variations.
Nutrition
- Serving Size: 1 cup
- Calories: 350
- Sugar: 31g
- Sodium: 400mg
- Fat: 22g
- Saturated Fat: 12g
- Unsaturated Fat: 10g
- Trans Fat: 0g
- Carbohydrates: 30g
- Fiber: 1g
- Protein: 6g
- Cholesterol: 60mg
Keywords: no-bake, cheesecake, dessert, individual servings, easy recipe