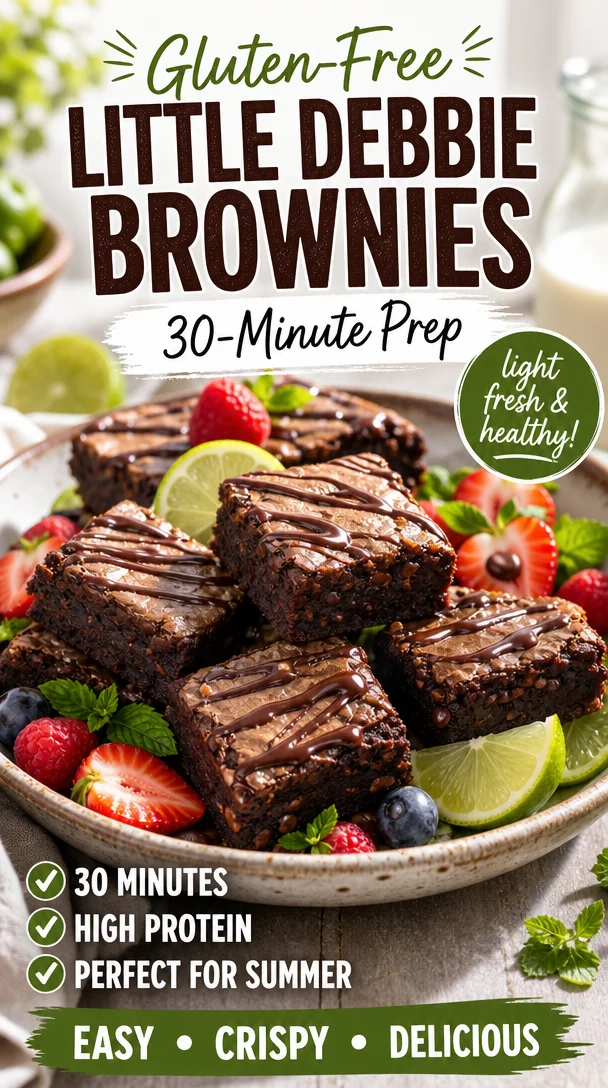
Indulge in Gluten-Free Little Debbie Brownies
Hey there, fellow foodies! Maddie Brooks here, excited to whip up something nostalgic and oh-so-chocolatey with you today! If you’ve ever enjoyed the iconic Little Debbie brownies — those chewy, fudgy delights — but thought, “Where’s the gluten-free version?” Well, hold onto your spatula because today, we’re making our very own Gluten-Free Little Debbie Brownies!
There’s something incredibly satisfying about recreating childhood treats in a way that fits into our modern dietary needs. These brownies are not just gluten-free; they’re packed with rich chocolatey goodness that will make your heart sing and your taste buds dance! Plus, they come together so quickly you’ll be wondering why you didn’t try this sooner. So, let’s dive in and bring some warmth back into our kitchens!
A Sweet Memory to Share
Growing up, one of my favorite treats was that bright blue box of Little Debbie brownies. My siblings and I would race to the kitchen after school, eager to unwrap those chocolatey bites topped with that oh-so-sweet layer of frosting. We’d sprinkle in a little sibling rivalry, trying to see who could devour their brownie the fastest (and maybe sneak an extra one when no one was looking!).
I remember one particular day, my mom decided to surprise us with a homemade version of those iconic brownies. She gathered us all in the kitchen, and together we mixed, poured, and licked the bowl — a ritual that sealed that warm memory in a way nothing else could. This gluten-free twist brings back those feelings of comfort and togetherness, and I can’t wait for you to experience those warm, loving moments again.
Ingredients
To make these delectable brownies, we’ll gather the following ingredients:
-
1 cup gluten-free flour blend
Look for a blend that has a mixture of flours like rice, almond, or oat; it should mimic all-purpose flour closely. If you don’t have a blend, you can make your own, but keep ratios in mind for best results. -
1 cup granulated sugar
This will sweeten our brownies beautifully! You can swap this with coconut sugar for a lower glycemic index option if you prefer. -
1/2 cup unsweetened cocoa powder
Choose a high-quality cocoa for richer flavor. If you want a little more depth, consider using dark cocoa powder. -
1/2 teaspoon baking powder
This helps our brownies rise just a bit! If you’re dealing with a strict gluten-free diet, make sure your baking powder is certified gluten-free. -
1/4 teaspoon salt
Salt enhances all the flavors, so don’t skip this! If you’re on a low-sodium diet, feel free to reduce it or omit it entirely. -
3 large eggs
These bind everything together and create that lovely texture. If you need an egg substitute, use flax eggs (1 tablespoon ground flaxseed mixed with 3 tablespoons water for each egg). -
1/2 cup melted butter
Butter gives our brownies that luscious, fudgy texture. For a dairy-free version, use coconut oil or a vegan butter substitute. -
1 teaspoon vanilla extract
This adds a lovely warmth to your brownies. Don’t skimp on quality—real extract makes a world of difference! -
1/2 cup chocolate chips (optional)
For chocolate lovers, throw in some semi-sweet or dark chocolate chips for extra gooeyness! You can use dairy-free chips for a vegan option.
Step-by-Step Instructions
Let’s roll up our sleeves and get cooking! Here’s how to make your Gluten-Free Little Debbie Brownies:
-
Preheat Your Oven
Start by preheating your oven to 350°F (175°C). This ensures that your brownies cook evenly and gives them that lovely rise and texture we’re after. Get that baking dish ready by greasing it or lining it with parchment paper for easy removal. A well-prepped pan is half the battle! -
Mix the Dry Ingredients
In a large mixing bowl, combine the gluten-free flour blend, granulated sugar, unsweetened cocoa powder, baking powder, and salt. Whisk everything together until nicely blended. This step is essential — it breaks up any cocoa clumps and helps everything mix uniformly. -
Whisk the Wet Ingredients
In a separate bowl, crack the three large eggs and whisk them together. Add in the melted butter (let it cool slightly so it doesn’t cook the eggs), and stir in the vanilla extract. The melted butter should mix seamlessly with the eggs, making everything creamy and ready for the next step. -
Combine Wet and Dry
Gradually pour the wet ingredients into the bowl with the dry mix, folding gently to combine. A spatula works well here; it helps create that perfect brownie batter texture. Do not overmix! A few streaks of flour are perfectly fine. -
Add the Chocolate Chips
If you’re choosing to add the chocolate chips, now’s the time! Fold them in gently until evenly distributed. Your batter should be thick and fudgy. Honestly, it’s okay to sneak a little taste at this point—just don’t eat all the batter! -
Pour into the Baking Dish
Transfer your brownie batter into the prepared baking dish, spreading it out evenly with a spatula. This helps ensure every corner gets that thick, fudgy goodness we love. -
Bake to Perfection
Pop your brownies into the preheated oven and bake for 25-30 minutes. To check for doneness, insert a toothpick into the center. If it comes out with a few moist crumbs, that’s your cue! Overbaking will lead to dry brownies, and we definitely want to avoid that. -
Cool and Slice
Once baked, remove the brownies from the oven and allow them to cool in the pan for about 10-15 minutes. Use the parchment paper to lift them out (if you used it) and onto a wire rack. Let them cool completely before slicing into squares. The cooling process helps firm them up, giving you that perfect brownie bite.
Serving Suggestions
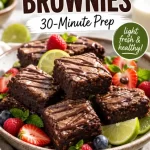
Now that you’ve whipped up these incredible brownies, it’s time to serve them! Consider plating them on a beautiful serving platter — they’re great on their own, but a dusting of powdered sugar or a drizzle of warm chocolate sauce really amps up the appeal! Pair them with a scoop of vanilla ice cream for that “à la mode” experience, or serve them with a dollop of whipped cream and a few fresh berries for a pop of color and freshness.
Recipe Variations
- Nutty Addition: Fold in some chopped walnuts or pecans for a crunchy twist.
- Minty Fresh: Add a few drops of peppermint extract to the batter for a refreshing flavor.
- Coconut Delight: Mix in shredded coconut for a tropical flair.
- Spicy Kick: Toss in a dash of cayenne or cinnamon for a warm and spicy finish!
- Fruit Fusion: Stir in some diced strawberries or raspberries for a fruit-forward brownie.
Chef’s Notes
These gluten-free brownies have certainly come a long way! I played around with different flour combinations before settling on a blend that gives a nice balance of chewiness and fudge. And trust me, I’ve had plenty of messy mishaps — imagine trying to bake a batch with only almond flour; let’s just say it resulted in some very sad little cakes! Now, these brownies are a go-to recipe for family gatherings, and they quickly disappear every time.
FAQs and Troubleshooting
-
My brownies are too crumbly; what went wrong?
If your brownies are falling apart, it could be that they were overbaked, or you might need a bit more moisture. Adding an extra egg can help! -
Can I freeze these brownies?
Absolutely! Just wrap them tightly in plastic wrap and place them in an airtight container. They’ll keep in the freezer for up to three months. Thaw at room temperature before indulging. -
What if I don’t have a gluten-free flour blend?
You can make your own blend by mixing 1/2 cup of almond flour and 1/2 cup of coconut flour for a different texture and nutty flavor. Just keep in mind this may alter the final product somewhat. -
How do I know when my brownies are done?
As mentioned before, use the toothpick method! Keep an eye on the time, as every oven is different. Remember, you want moist crumbs, not wet batter!
Nutritional Info
(Estimates per serving, based on 12 brownies)
- Calories: 180
- Protein: 3g
- Fat: 7g
- Carbohydrates: 29g
- Fiber: 2g
- Sugar: 12g
There you have it, my friends! A delightful journey into making gluten-free Little Debbie brownies that spark nostalgia and create new memories. Gather your ingredients, invite a friend or two, and let the kitchen fill with warmth and laughter. Happy baking, and may your brownies always be fudgy and delicious!
PrintGluten-Free Little Debbie Brownies
Indulge in nostalgic, fudgy brownies made gluten-free, perfect for a modern dietary needs.
- Prep Time: 15 minutes
- Cook Time: 30 minutes
- Total Time: 45 minutes
- Yield: 12 servings 1x
- Category: Dessert
- Method: Baking
- Cuisine: American
- Diet: Gluten-Free
Ingredients
- 1 cup gluten-free flour blend
- 1 cup granulated sugar
- 1/2 cup unsweetened cocoa powder
- 1/2 teaspoon baking powder
- 1/4 teaspoon salt
- 3 large eggs
- 1/2 cup melted butter
- 1 teaspoon vanilla extract
- 1/2 cup chocolate chips (optional)
Instructions
- Preheat your oven to 350°F (175°C) and prepare your baking dish.
- Mix the gluten-free flour blend, sugar, cocoa powder, baking powder, and salt in a bowl.
- Whisk the eggs in a separate bowl, then add melted butter and vanilla extract.
- Combine the wet and dry ingredients, folding gently until mixed.
- Add the chocolate chips if desired and fold in gently.
- Pour the batter into the prepared baking dish.
- Bake for 25-30 minutes, checking for doneness with a toothpick.
- Cool in the pan for 10-15 minutes before slicing.
Notes
For best results, don’t overmix the batter. Allowing the brownies to cool completely ensures the right texture.
Nutrition
- Serving Size: 1 brownie
- Calories: 180
- Sugar: 12g
- Sodium: 100mg
- Fat: 7g
- Saturated Fat: 4g
- Unsaturated Fat: 2g
- Trans Fat: 0g
- Carbohydrates: 29g
- Fiber: 2g
- Protein: 3g
- Cholesterol: 30mg
Keywords: brownies, gluten-free dessert, nostalgic treats, chocolate brownies