Pumpkin Marble Cake: A Slice of Autumn Bliss
Ah, fall! The golden leaves, the crisp air, and the irresistible aroma of pumpkins and spices wafting through the kitchen. One of my absolute favorite treats to whip up during this season is a delightful Pumpkin Marble Cake—where rich, buttery cake meets the warm, cozy embrace of pumpkin puree and a touch of chocolate. If you’re looking to bring some autumn magic to your kitchen, you’re in the right place!
Home Sweet Home in Every Bite
Picture this: my grandmother in her cozy kitchen, the sun streaming through the window as the scent of cinnamon and nutmeg fills the air. She would often have a signature dish that would make its way to every family gathering—a moist, comforting cake that brought everyone together. This cake had layers of flavor that harmonized beautifully, always reminding me of home. It was no ordinary cake; it had a marble effect that made each slice a delightful surprise.
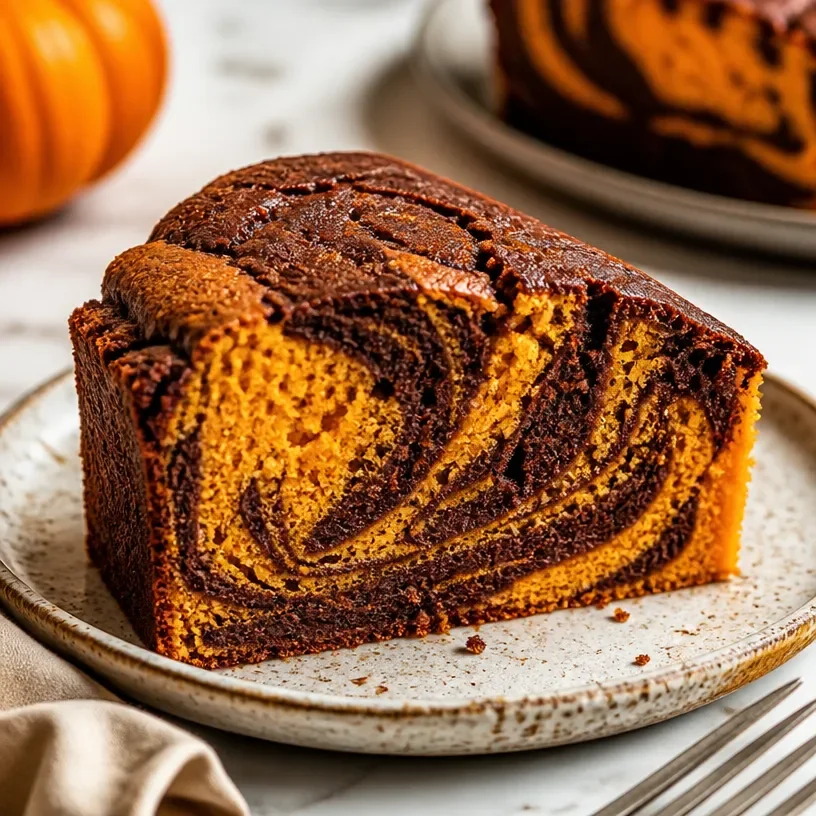
As I got older and found my passion for baking, I played around with those nostalgic flavors, putting my own twist on that beloved recipe. My version combines the sweet essence of pumpkin with rich cocoa, creating a beautiful marble effect that’s as pleasing to the eyes as it is to the palate. Trust me, once you taste this cake, you’ll understand why it holds such a special place in my heart (and in the hearts of everyone I share it with!).
Ingredients You’ll Need
Let’s gather the star players for our Pumpkin Marble Cake! Here’s what you’ll need:
-
2 cups all-purpose flour
The base of our cake! You’re welcome to swap in whole wheat flour for a hint of nuttiness or gluten-free flour if you prefer a gluten-free option. Just ensure you use a blend that can mimic the texture of all-purpose flour. -
1 cup pumpkin puree
Use the good stuff—make sure it’s actual pumpkin puree and not pumpkin pie filling, which has added spices and sweeteners. You can easily substitute with mashed sweet potatoes for a different yet equally delicious flavor! -
2 large eggs
These beauties bind our cake together, providing moisture and structure. If you’re vegan or egg-free, substitute with 1/4 cup unsweetened applesauce or a flax egg (1 tablespoon ground flaxseed mixed with 2.5 tablespoons water). -
1/4 cup cocoa powder
For that rich, chocolatey swirl! You can opt for dark cocoa for an even deeper flavor and color. Alternatively, carob powder could be a fun, caffeine-free swap! -
3/4 cup granulated sugar
This sweetens the cake nicely! If you like things a bit healthier, try coconut sugar or a sugar alternative like maple syrup (but be sure to adjust your liquid ingredients accordingly). -
1/2 cup vegetable oil
The oil keeps the cake moist and tender. You can swap it for melted coconut oil or applesauce for a lower-fat version. -
2 teaspoons baking powder
This is our leavening agent, ensuring our cake rises beautifully! If you run out, a mix of baking soda plus vinegar can also do the trick.
Step-by-Step Instructions
Step 1: Preheat the Oven
Start by preheating your oven to 350°F (175°C). This ensures that your cake bakes evenly and rises beautifully. While the oven warms up, gather your ingredients and have fun—turn on some music or pour yourself a cozy cup of tea!
Step 2: Prepare Your Pans
Grease and flour a 9×5 inch loaf pan (or two smaller pans for mini loaves). Don’t skip this step! You want your cake to release easily once it’s baked. Sometimes I like to line the bottom of the pan with parchment paper for that little extra assurance.
Step 3: Whisk the Dry Ingredients
In a medium bowl, whisk together the flour, sugar, baking powder, and cocoa powder. This step is crucial for even distribution. Making sure there are no lumps will help your cake turn out fluffy and smooth.
Step 4: Combine the Wet Ingredients
In a large bowl, blend the pumpkin puree, eggs, and oil until well combined. I usually use a handheld mixer for this part for perfection, but a whisk will do just fine! Just think of all those good vibes you’re mixing into the cake.
Step 5: Combine Dry and Wet
Slowly add the dry ingredients to the wet ingredients, mixing gently until just combined. Don’t over-mix! Less is more here, as we want to keep that lovely texture intact. You’ll want to see a few lovely floury pockets because that means your cake will be light and airy.
Step 6: Create the Marble Effect
Now comes the fun part! Take half of the batter and transfer it into another bowl. Mix in cocoa powder until thoroughly combined. You should have two batters: one pumpkin-colored and one chocolatey brown.
Now, in your greased pan, alternate dollops of the pumpkin batter and cocoa batter. Use a skewer or knife to swirl them together gently. The mixing will create that stunning marbled effect—it’s like a beautiful canvas covered in autumnal hues!
Step 7: Bake
Pop your cake into the preheated oven and bake for 50-60 minutes or until a toothpick inserted into the center comes out clean. I usually start checking around the 50-minute mark. The smell wafting from the oven will be irresistible!
Step 8: Cool and Enjoy
Once done, allow the cake to cool for about 10-15 minutes in the pan before transferring it to a wire rack. This cooling period is crucial for developing those deep flavors. Once cool, slice and enjoy!
Serving Suggestions
Serve your Pumpkin Marble Cake with a dusting of powdered sugar or a dollop of whipped cream. For an extra touch of fall, consider adding a sprinkle of cinnamon or nutmeg on top! It’s perfect as a cozy dessert or an afternoon snack with coffee—maybe even curl up with a good book!
Recipe Variations
-
Chocolate Chip Delight: Fold in some chocolate chips into both batters for extra sweetness and texture. Think of it as a little surprise in every bite!
-
Nutty Crunch: Add chopped walnuts or pecans for a bit of crunch. They complement the softness of the cake beautifully.
-
Spiced Up Version: Enhance the pumpkin flavor by adding pumpkin spice or a dash of ginger and cloves. It will elevate the cake’s cozy vibes exponentially!
-
Glazed Finish: Drizzle a simple icing made with powdered sugar and milk over the cooled cake for a beautiful finish.
Chef’s Notes
This Pumpkin Marble Cake has undergone some transformations over the years. I started with my grandma’s classic recipe, but through experimentation, I discovered the wonders of swapping in different flours and oils. Each new twist brings a different vibe—sometimes it’s an indulgent treat, other times it’s a healthier option. And honestly, I love sharing the different versions with my loved ones. They say the best part about cooking is that you can always modify a recipe to suit your taste and preferences.
Just remember, whether it’s a slice of cake in the afternoon or an evening dessert gathering, food should always feel like love!
FAQs and Troubleshooting
Q: Why is my cake not rising?
A: There are a few possible reasons here! Ensure your baking powder is fresh (check the expiration date), and be careful not to overmix the batter as this can cause a dense cake.
Q: My cake turned out too dry. What happened?
A: This can sometimes happen if the cake is overbaked or if you measured too much flour. Try measuring your flour using the spoon-and-level method for accuracy!
Q: How can I store unchanged cake?
A: Keep your cake in an airtight container at room temperature for up to three days. If you want it to last longer, you can freeze it for up to three months. Wrap it in plastic wrap and then place it in a freezer bag.
Q: Can I make this cake in advance?
A: Absolutely! You can bake it a day or two ahead of your gathering. Just store it well! You can even freeze it and thaw it when you need it.
Nutritional Info
While I’m not a nutritionist, this pumpkin marble cake packs plenty of flavor with each slice and offers a slight health benefit from the pumpkin—a great source of vitamins and fiber!
So there you have it! A joyful journey through the making of Pumpkin Marble Cake, filled with warmth, love, and a hint of nostalgia. I hope this recipe inspires you to create your own delightful memories in the kitchen. Happy baking, foodies—let’s keep those cozy kitchen vibes alive!
PrintPumpkin Marble Cake
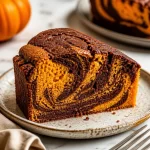
A delightful combination of pumpkin puree and chocolate in a moist, marbled cake that embodies the essence of autumn.
- Prep Time: 15 minutes
- Cook Time: 60 minutes
- Total Time: 75 minutes
- Yield: 8 servings 1x
- Category: Dessert
- Method: Baking
- Cuisine: American
- Diet: Vegetarian
Ingredients
- 2 cups all-purpose flour
- 1 cup pumpkin puree
- 2 large eggs
- 1/4 cup cocoa powder
- 3/4 cup granulated sugar
- 1/2 cup vegetable oil
- 2 teaspoons baking powder
Instructions
- Preheat your oven to 350°F (175°C).
- Grease and flour a 9×5 inch loaf pan.
- Whisk together the flour, sugar, baking powder, and cocoa powder.
- Blend the pumpkin puree, eggs, and oil until well combined.
- Slowly add the dry ingredients to the wet ingredients, mixing gently until just combined.
- Take half of the batter and transfer it into another bowl. Mix in cocoa powder until combined.
- Alternate dollops of pumpkin batter and cocoa batter in the greased pan, swirling gently to create a marble effect.
- Bake for 50-60 minutes or until a toothpick comes out clean.
- Allow the cake to cool for 10-15 minutes before transferring to a wire rack.
Notes
Serve with powdered sugar or whipped cream. Consider adding spices for extra flavor.
Nutrition
- Serving Size: 1 slice
- Calories: 350
- Sugar: 15g
- Sodium: 200mg
- Fat: 14g
- Saturated Fat: 2g
- Unsaturated Fat: 8g
- Trans Fat: 0g
- Carbohydrates: 45g
- Fiber: 3g
- Protein: 4g
- Cholesterol: 30mg
Keywords: pumpkin cake, marble cake, autumn dessert, fall baking, pumpkin recipes