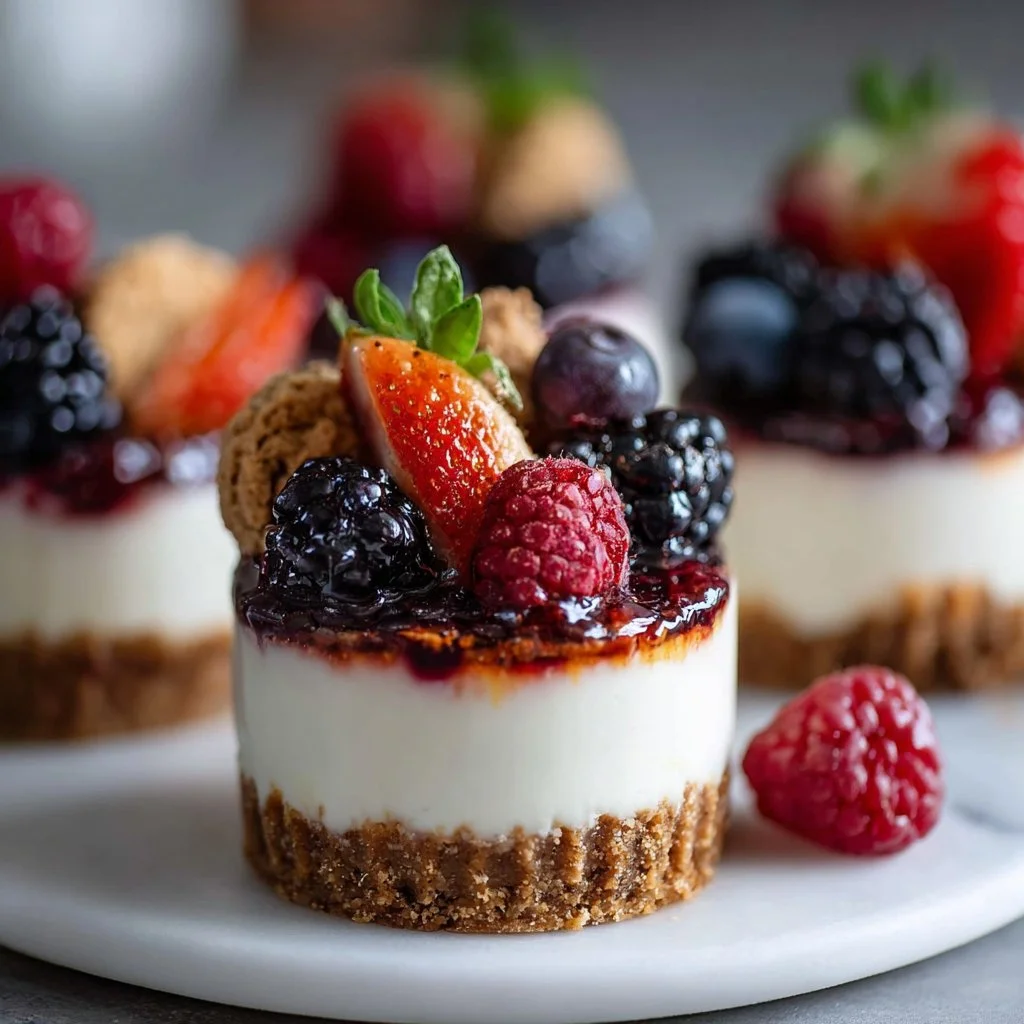
# No-Bake Cheesecake Cups: Easy Creamy Dessert with Fruit or Cookie Toppings
## Introduction
Hey there, fellow food lovers! If you’re anything like me, dessert holds a special place in your heart—and your kitchen! Today, I’m excited to share a recipe for No-Bake Cheesecake Cups that will make you swoon with delight. Think about it: a creamy, dreamy cheesecake filling, all tucked into cute little cups, and topped with whatever sweet wonders you can dream up! Whether it's fresh berries, crushed cookies, or decadent chocolate, these cups are adaptable to your flavor dreams.
Imagine hosting a friendly gathering. Guests are mingling, laughter is in the air, and right at the center of the action is a platter of these delicious cheesecake cups. They not only look elegant; they hold the essence of comfort food right in their petite forms. Best of all, they’re no-bake! That means you can whip them up even when the oven is busy roasting a family chicken dinner or you just want to avoid turning on the heat.
As a cook, I cherish moments spent in the kitchen creating something that can foster joy, connection, and lots of smiles. And these No-Bake Cheesecake Cups do just that! They're perfect for sharing those special moments around the dining table without the worry of complicated baking steps or long preparation times. So, tie on your apron, and let’s dive into this delicious treat that’s as easy as it is delightful!
## Personal Story
I still remember the first time I attempted to make a no-bake cheesecake. It was one summer afternoon when my cousin Jenna came over. We grew up sharing all sorts of culinary adventures in our kitchen, from baking cookies that turned out more like chocolate blobs to experimenting with savory dishes that sometimes went awry. But this time, we were ready to tackle a classic dessert!
We rummaged through the pantry and came up with just the right ingredients. I recall the smell of softened cream cheese and the sweet caress of powdered sugar filling the kitchen as we whisked and folded our way to cheesecake perfection. Once we piled the fluffy filling into cups, we crowned them with a burst of fresh strawberries from the garden. It was a moment of magic—simple ingredients transforming into something luxurious!
That day, we not only made dessert; we created a lasting memory, filled with laughter and joy. We realized that sometimes, it’s not about the complexity of the dish, but the love and joy you pour into it—and that’s what I aim to share through these No-Bake Cheesecake Cups!
## Ingredients
Here’s what you’ll need to bring these delightful No-Bake Cheesecake Cups to life:
- **1 cup graham cracker crumbs**
*The base of our cheesecake cups! You can use store-bought crumbs or crush whole graham crackers. For a gluten-free option, try almond flour or gluten-free cookies.*
- **3 tbsp butter, melted**
*This allows the crumbs to bind together, creating a delightful crust. Unsalted butter is best but if you're in a pinch, margarine works fine too!*
- **1 tbsp brown sugar**
*For an added hint of caramel-like sweetness in the crust. If you don't have brown sugar, white sugar can work—just add a splash of milk for richness.*
- **8 oz cream cheese, softened**
*The star of this dessert! Make sure it's at room temperature to avoid lumps. Neufchâtel cheese is a lighter option if you're looking to cut calories.*
- **½ cup powdered sugar**
*It sweetens the filling and adds that irresistible sweetness. If you prefer, you can use agave syrup for a different flavor profile.*
- **1 tsp vanilla extract**
*A must-have for enhancement of flavors! You can also replace it with almond extract for a different twist.*
- **1 cup whipped topping**
*This makes our cheesecake light and airy! Cool Whip or homemade whipped cream work well. For a dairy-free alternative, look for coconut whipped cream.*
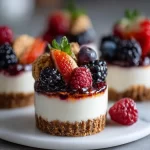
- **Berries or crushed cookies for topping**
*The best part where you can get creative! Use your favorite fruits like strawberries, blueberries, or even seasonal fruits. Crushed Oreos or chocolate wafers can add an extra layer of joy!*
## Step-by-Step Instructions
Let's get our beautiful dessert mixed and ready to shine!
1. **Prepare the Crust**
In a medium mixing bowl, combine the graham cracker crumbs, melted butter, and brown sugar. Mix it until it resembles wet sand. Your hands might get a little dirty here—don’t be shy! The more you mix, the better the crust will hold together when you pack it down.
2. **Pack the Crust**
Grab your serving cups—these can be small mason jars, clear plastic cups, or even dessert bowls. Spoon a generous layer of the graham cracker mixture into each cup, pressing it down firmly with the back of a spoon or your fingers. Make sure it’s well packed; this will prevent the crust from crumbling later!
3. **Make the Cheesecake Filling**
In a large mixing bowl, beat the softened cream cheese using an electric mixer until it’s smooth and fluffy. Gradually add in the powdered sugar and vanilla extract, mixing until well incorporated. Make sure there are no lumps for that perfect creamy texture!
4. **Fold in the Whipped Topping**
Gently fold in the whipped topping until the mixture is smooth and light. I love this step—it’s like fluffing up clouds! This will give us that classic cheesecake creaminess while keeping it light.
5. **Layer the Filling**
Now, generously spoon the cheesecake filling over the crust in each cup. Don’t be shy—fill them to the brim! If you want to create an elegant look, you can use a piping bag to pipe the filling on top.
6. **Add Your Toppings**
Top each cheesecake cup with your chosen fruits or crushed cookies. If you’re using fresh berries, consider giving them a quick rinse and pat dry first. The vibrant colors of the berries will make your cups pop!
7. **Chill Time!**
Cover your cups with plastic wrap and place them in the refrigerator to chill for at least 2 hours. This helps the cheesecake set and allows the flavors to meld beautifully. You can prep these a day ahead for extra convenience!
8. **Serve & Enjoy!**
After they’ve chilled, take a moment to appreciate your work! Serve the cheesecake cups with a sprinkle of additional crushed cookies or a few extra berries on top for a lovely presentation.
## Serving Suggestions
To really impress your guests, consider arranging the No-Bake Cheesecake Cups on a rustic wooden platter or a bright, colorful cake stand. Scatter some additional fresh berries around the cups for vibrancy, or place a handful of mint leaves for a pop of green. Pair these with a little jug of coffee or a refreshing iced tea, and voilà—you have yourself a charming dessert display!
## Recipe Variations
Want to mix things up a bit? Here are a few fun variations to inspire your inner chef:
1. **Chocolate Cheesecake Cups**
Add ¼ cup of melted chocolate or cocoa powder into the filling. Top with chocolate shavings or an extra chocolate drizzle!
2. **Fruit-Infused Filling**
Fold in a cup of crushed fruit, like strawberries, peaches or mango, into the cheesecake mixture for fruity goodness!
3. **Nutty Flavor**
Add a tablespoon of your favorite nut butter to the filling for a flavor boost. Consider topping with crushed nuts for that extra crunch.
4. **Coffee Lovers Delight**
Mix in a teaspoon of instant coffee granules to the cheesecake filling for a mocha flavor that coffee lovers will adore.
5. **Seasonal Pumpkin Spice**
In the autumn, add ½ cup of pure pumpkin puree and a teaspoon of pumpkin spice to the filling for a seasonal twist.
## Chef’s Notes
I still giggle every time I think about how my cousin and I once tried to use Jell-O and cream cheese to make a “fancy” layered dessert, and we ended up with a color explosion that didn’t set properly—let’s just say, it was more of a trifle disaster! But those kitchen mishaps taught me that cooking (and baking) should always be about joy and creativity, allowing room for both epic wins and giggle-worthy fails!
Over the years, this No-Bake Cheesecake Cup recipe has evolved to match my personal cooking style. I’ve played around with flavors and toppings, discovering new combinations that surprise and delight my family and friends. It remains a staple in my kitchen, reminding me that simple pleasures can bring the most joy.
## FAQs and Troubleshooting
**1. My cheesecake filling turned out lumpy! What happened?**
This usually happens when the cream cheese isn’t softened enough. Make sure to let it sit out at room temperature for a bit before mixing, making it easier to blend smoothly. You can also give it a quick whir in the microwave for about 10 seconds if needed!
**2. How long can I store these cups?**
The No-Bake Cheesecake Cups can be stored in the refrigerator for up to 3-4 days. Just make sure to keep them covered to maintain freshness. Trust me—if they last that long, you’re in for a treat each day!
**3. Can I freeze these cheesecake cups?**
Yes, you can! Just be mindful that the texture may change a bit upon thawing. Freeze them without toppings for best results. When you’re ready to enjoy, simply thaw in the fridge and add your toppings right before serving.
**4. What if I don’t have whipped topping?**
No worries! You can whip up your own heavy cream with a bit of sugar until it forms soft peaks and substitute it for the whipped topping. It adds a homemade touch too!
## Nutritional Info
*(Optional Information)*
Serving Size: 1 cheesecake cup
Calories: Approximately 220
Total Fat: 13g
Saturated Fat: 8g
Carbohydrates: 23g
Sugars: 10g
Protein: 3g
---
So, there you have it—the ultimate easy No-Bake Cheesecake Cups! I hope you feel inspired to create these delightful treats and share them with the ones you love. Let’s keep the heart of the kitchen alive—happy cooking!
No-Bake Cheesecake Cups
Creamy, dreamy no-bake cheesecake cups topped with fruits or cookies, perfect for a delightful dessert.
- Prep Time: 15 minutes
- Cook Time: 120 minutes
- Total Time: 135 minutes
- Yield: 4 servings 1x
- Category: Dessert
- Method: No-Bake
- Cuisine: American
- Diet: Vegetarian
Ingredients
Scale
- 1 cup graham cracker crumbs
- 3 tbsp butter, melted
- 1 tbsp brown sugar
- 8 oz cream cheese, softened
- ½ cup powdered sugar
- 1 tsp vanilla extract
- 1 cup whipped topping
- Berries or crushed cookies for topping
Instructions
- Prepare the crust: In a medium bowl, combine graham cracker crumbs, melted butter, and brown sugar.
- Pack the crust into serving cups firmly.
- Make the cheesecake filling by beating cream cheese until smooth, then adding powdered sugar and vanilla.
- Fold in the whipped topping until smooth.
- Layer the filling over the crust in each cup.
- Add your toppings of berries or crushed cookies.
- Chill in the refrigerator for at least 2 hours.
- Serve and enjoy!
Notes
These cups can be made a day ahead for convenience and can be customized with various toppings.
Nutrition
- Serving Size: 1 serving
- Calories: 220
- Sugar: 10g
- Sodium: 200mg
- Fat: 13g
- Saturated Fat: 8g
- Unsaturated Fat: 5g
- Trans Fat: 0g
- Carbohydrates: 23g
- Fiber: 1g
- Protein: 3g
- Cholesterol: 30mg
Keywords: cheesecake, no-bake, dessert, easy dessert, creamy dessert
Categories: