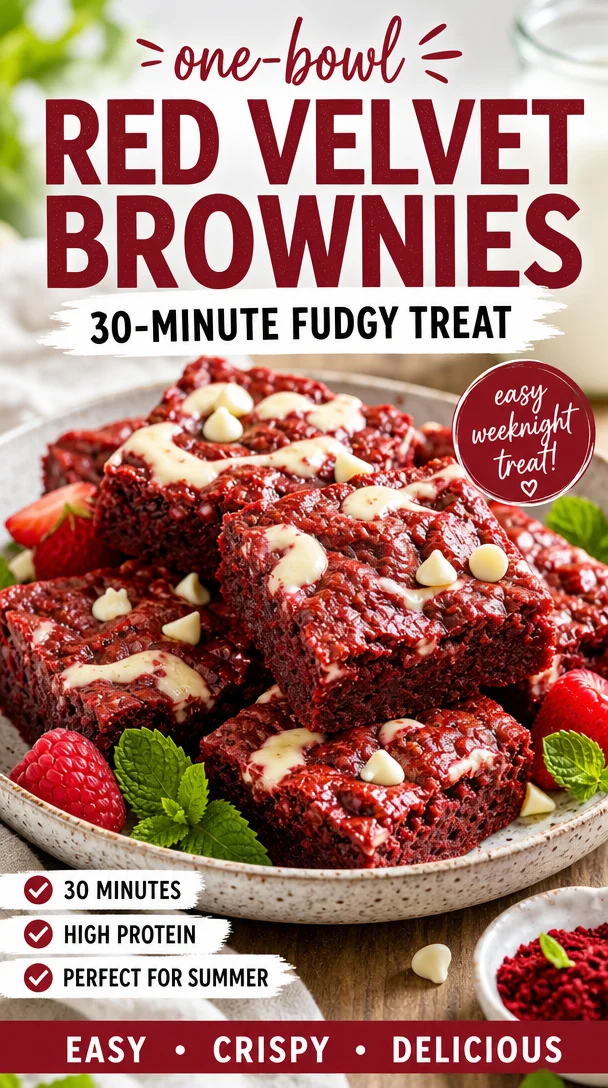
Indulge in Irresistible Red Velvet Brownies
Hey there, kitchen friends! Today, I’m bursting with excitement to share a decadent, rich, and oh-so-lush treat that’s sure to bring a sparkle to your eyes: Red Velvet Brownies. If you’ve ever loved red velvet cake—and honestly, who hasn’t?—you’re going to adore these delectable brownies that capture all the charm of that classic dessert but in a fudgy, brownie form.
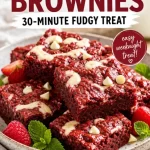
Imagine biting into a soft, moist brownie with that signature red hue and a slight cocoa flavor, topped off with a drizzle of white chocolate. Pure bliss! Whether you’re preparing for a party, a cozy gathering, or just a treat for yourself, these brownies are the perfect way to spread some sweetness.
A Sweet Memory: The First Red Velvet Experience
Let me take you back to my first encounter with red velvet—oh, what a delight that was! I was a young girl at my grandmother’s house, and she was known for her vibrant, velvety cakes. One day, she pulled out the ingredients to make her famous red velvet cake, a family favorite, for my birthday.
With the kitchen filled with aromas of cocoa, butter, and a hint of vanilla, I watched in awe as she whipped up this masterpiece. The deep red batter seemed like magic, and my grandma explained the importance of each ingredient, especially the vinegar that helped the baking soda do its magic.
After what felt like an eternity, we finally pulled the cake from the oven—the rich scent wafting through every corner of the house. I remember the first slice melting in my mouth, the way the crumb was light but moist, and how I was captivated. It was in that moment I realized dessert could be more than a sweet treat; it could be an experience, a story, and most importantly, a way to build memories with those we love. That first slice of red velvet cake inspired me to create these luscious red velvet brownies, ensuring every bite offers the same joy and warmth I felt back then. Now, let’s get to baking!
Ingredients You’ll Need
Here’s what you’ll need to whip up these scrumptious Red Velvet Brownies:
-
3/4 cup unsalted butter (melted)
This adds richness and moisture. If you need a dairy-free option, you can swap it for coconut oil or vegan butter. -
2 oz chopped semi-sweet chocolate bar
A little dark chocolate enhances the flavor. Can’t find a chocolate bar? Chocolate chips work just as fine! -
1 & 1/4 cup granulated sugar
This gives the brownies their sweetness! For a healthier option, consider using coconut sugar for a less refined sweetener. -
2 large eggs
Eggs bind everything together and create that lovely texture. For a vegan version, you can use flax eggs (1 tablespoon ground flaxseed + 2.5 tablespoons water = 1 egg). -
2 teaspoon vanilla extract
This adds a warm note of flavor. Homemade vanilla extract is divine if you have the time! -
1 teaspoon white vinegar
This is crucial for that classic red velvet tang, encouraging the baking soda to react. If you’re in a pinch, lemon juice is a great substitute. -
1/2 tablespoons red gel food coloring
This gives the brownies their signature red color. Liquid food coloring is okay too, but less vibrant, so adjust accordingly. -
2 tablespoons unsweetened cocoa powder
A must for that deep chocolate flavor. Use Dutch-processed cocoa for a richer taste. -
1 & 1/4 cup all-purpose flour
This is the base of your brownie batter. If you’re gluten-free, you can swap this with a gluten-free all-purpose blend. -
1/4 teaspoon salt
Just a pinch enhances sweetness and balances flavors. -
1/2 cup white chocolate chips (optional)
Add them to the mixture for a delightful surprise, or melt them to drizzle on top for an extra flourish!
Step-by-Step Instructions: Let’s Bake!
Ready to bake these beauties? Let’s roll up our sleeves and get started!
-
Preheat the Oven:
Preheat your oven to 350°F (175°C). This is a crucial step! A properly heated oven ensures even baking, meaning no gooey centers or burnt edges. -
Prepare Your Pan:
Grease a 9×9 inch baking pan with butter or line it with parchment paper for easy removal once baked. I love using parchment because it helps the brownies lift out easily and keeps the sides from sticking. -
Melt the Butter and Chocolate:
In a medium saucepan over low heat, melt the unsalted butter and chopped chocolate together. Stir gently until smooth and combined. Here’s a chef hack: if you’re short on time, you can melt them in the microwave in increments of 20 seconds, stirring in between! -
Mix in the Sugar and Eggs:
Once the chocolate mixture is slightly cooled, stir in the granulated sugar until well combined. Then, add the eggs one at a time, stirring after each addition until fully incorporated. Don’t be afraid to mix with a trusty wooden spoon! It gives a feel of tradition to the process. -
Stir in the Flavorings:
Add the vanilla extract and white vinegar to the chocolate mixture. Your kitchen should now smell so amazing! -
Add the Red Food Coloring:
Gently mix in the red gel food coloring. The magic happens here! You want to see that deep, vibrant red swirl throughout the batter. -
Incorporate Dry Ingredients:
In a separate bowl, whisk together the cocoa powder, all-purpose flour, and salt. Gradually fold the dry mixture into the wet ingredients using a spatula or the wooden spoon. Stir until just combined; be careful not to over-mix! -
Optional White Chocolate Chips:
If you’re using white chocolate chips, now’s the time to fold them in. This adds an extra burst of flavor in every bite. -
Pour and Bake:
Pour the batter into your prepared baking pan, smoothing the top with your spatula. Bake in your preheated oven for about 25-30 minutes. Pro Tip: Check for doneness by inserting a toothpick; it should come out with a few moist crumbs but not wet batter. -
Cool Down:
Once done, remove the brownies from the oven and allow them to cool in the pan on a wire rack. This cooling phase is important; it allows the brownies to set and develop their fudginess.
Serve Up a Slice of Happiness
Serving these Red Velvet Brownies can be just as fun as making them! Cut them into squares or rectangles, and consider serving them warm with a scoop of vanilla ice cream on top for an indulgent dessert experience. A light dusting of powdered sugar adds a lovely finishing touch.
Better yet, plate them up on a rustic wooden board for a cozy presentation that invites friends and family to dig in and share stories. After all, that’s what Hearthful Kitchen is all about—creating moments.
Recipe Variations: Get Creative!
Feeling adventurous? Here are some fun variations to spice up your Red Velvet Brownies:
-
Nutty Delight: Add 1/2 cup of chopped pecans or walnuts for a delightful crunch.
-
Cream Cheese Swirl: Before baking, dollop some sweetened cream cheese mixture on top of the brownie batter and swirl it in with a knife for a delicious marbled effect.
-
Spicy Kick: Add a pinch of cayenne pepper to the batter for a hint of heat that pairs delightfully with chocolate.
-
Vegan Red Velvet Brownies: Replace eggs with flax eggs, and use unsweetened applesauce instead of butter for a deliciously vegan-friendly treat.
-
Red Velvet Cookie Bars: Spread the brownie batter in a larger baking pan (like 12×12) and bake for a shorter time for gooey cookie bars!
Chef’s Notes: A Bit of Wisdom
You may find this recipe evolving as you try it out—whether it’s through experimentation or by adding your special twist! As a home cook, I’ve learned that the kitchen offers endless possibilities and a canvas for creativity. What matters most is the joy of cooking and the memories created along the way.
I still remember a friend’s birthday when I decided to surprise him with a batch of Red Velvet Brownies. Not only did he love them, but they became a tradition. Every birthday since, I’ve returned to this recipe, adding my special touch (and maybe a dash of extra love). Always remember: cooking is about warmth and thoughtfulness.
FAQs and Troubleshooting
1. Why did my brownies turn out dry?
This could be due to overbaking. Be sure to check them a few minutes before the timer goes off! They should look set at the edges but slightly soft in the center.
2. Can I use liquid food coloring instead of gel?
Yes, but remember that liquid food coloring tends to give a less vibrant hue. You’ll need to use more to achieve the same color, so keep that in mind!
3. How do I store leftover brownies?
Store them in an airtight container at room temperature for up to 3 days or in the refrigerator for a week. You can even freeze them—just make sure to thaw them completely before serving!
4. What should I do if my batter is too thick?
If your batter seems overly thick (which can happen sometimes due to flour measurements), try folding in a tablespoon of milk or water to loosen it up.
Sweet Finale: Nutritional Info (Optional)
For those who like a peek into the nutrition aspects, here’s a rough breakdown per brownie (assuming you cut into 16 squares):
- Calories: Approximately 210
- Total Fat: 12g
- Saturated Fat: 7g
- Cholesterol: 40mg
- Sodium: 100mg
- Total Carbohydrates: 25g
- Dietary Fiber: 1g
- Sugars: 18g
- Protein: 3g
(These figures can vary based on ingredients and portion sizes, so be sure to adjust if you’re employing substitutions!)
There you have it—a luscious, gooey, scrumptious treat that’s sure to light up your kitchen and bring a smile to your face. Thanks for joining me in this baking escapade! I can’t wait to hear about your baking adventures and any delightful twists you come up with. Let’s keep sharing these beautiful moments, one brownie at a time! Happy baking!
PrintRed Velvet Brownies
Decadent brownies with the rich flavors of red velvet and a drizzle of white chocolate, perfect for any occasion.
- Prep Time: 15 minutes
- Cook Time: 30 minutes
- Total Time: 45 minutes
- Yield: 16 servings 1x
- Category: Dessert
- Method: Baking
- Cuisine: American
- Diet: Vegetarian
Ingredients
- 3/4 cup unsalted butter (melted)
- 2 oz chopped semi-sweet chocolate bar
- 1 1/4 cup granulated sugar
- 2 large eggs
- 2 teaspoons vanilla extract
- 1 teaspoon white vinegar
- 1/2 tablespoon red gel food coloring
- 2 tablespoons unsweetened cocoa powder
- 1 1/4 cup all-purpose flour
- 1/4 teaspoon salt
- 1/2 cup white chocolate chips (optional)
Instructions
- Preheat your oven to 350°F (175°C).
- Grease a 9×9 inch baking pan with butter or line it with parchment paper.
- Melt the unsalted butter and chopped chocolate in a medium saucepan over low heat.
- Mix in the granulated sugar until well combined.
- Add the eggs one at a time, stirring after each addition.
- Stir in the vanilla extract and white vinegar.
- Add the red gel food coloring, mixing until incorporated.
- Incorporate the cocoa powder, all-purpose flour, and salt into the mixture.
- Optional: Fold in the white chocolate chips.
- Pour the batter into the prepared baking pan and smooth the top.
- Bake for 25-30 minutes, checking for doneness.
- Cool the brownies in the pan on a wire rack.
Notes
Enjoy with a scoop of vanilla ice cream or a dusting of powdered sugar for a delightful treat!
Nutrition
- Serving Size: 1 brownie
- Calories: 210
- Sugar: 18g
- Sodium: 100mg
- Fat: 12g
- Saturated Fat: 7g
- Unsaturated Fat: 5g
- Trans Fat: 0g
- Carbohydrates: 25g
- Fiber: 1g
- Protein: 3g
- Cholesterol: 40mg
Keywords: red velvet, brownies, dessert, chocolate, sweet treat